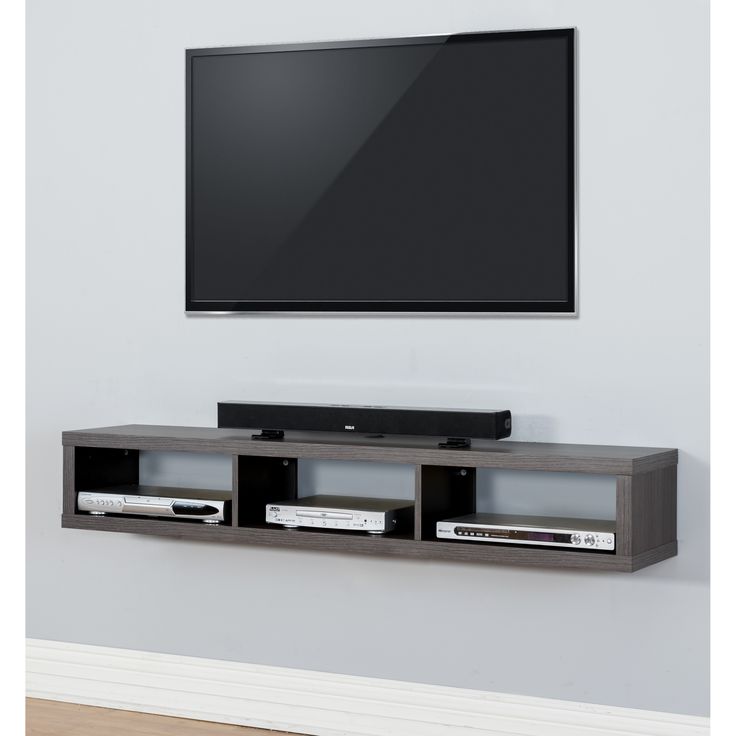
 Nothing looks better than a wall mounted TV that is clean, without clutter or wires showing! We'll show you how quickly and relatively inexpensive it is to install a wall mounted TV without all of the clutter. Mounting your TV to the wall is not only a great way to save space, but it also looks nice and clean. However, there’s a little more to it than just buying a wall mount and screwing in your TV. Here are a handful of things you should know when it comes to mounting your TV to the wall. Decide Where to Mount Your TV First off, you need to figure out exactly where you want your TV to go. This is something that is ultimately up to you, but there are a couple of rules of thumb to be aware of. The most important rule is to mount your TV at eye level from where you’ll be watching it, if at all possible. This usually means the bottom of the TV will be somewhere around 2-3 feet off the ground, give or take a few inches. Many people mount their TV up high above a fireplace or bookshelf, but that’s usually a bad idea since you crane your neck up to see your TV, which can be very uncomfortable when done for an extended period of time. The only exception is in the bedroom, where you might want to lie down and watch TV at the same time—having the TV mounted up higher toward the ceiling is great for this, as you would have to tilt your head forward as severely. We've researched the web and we were able to find all of the mounts, brackets and wiring set up that you'll need from Amazon......they're cheap and if you have a Prime Membership, it will be at your front door in days. Mounting Systems Get the Right Mount Type and Size, there are generally two types of wall mounts that you’ll come across. The first one is an articulating mount, which comes with a couple of articulating joints that allow you to pull the TV out from the wall and turn it in nearly any direction. The second type of TV wall mount is also the most common, called a tilting mount. These allow you to mount your TV to the wall at multiple points—sometimes up to six—so they’re great for larger, heavier televisions. The only downside is that you can’t swivel the TV side-to-side—you can only tilt it up or down, and even then you can only tilt it a few degrees. But if you’re going to be mounting it at eye level right in front of the couch, you really don’t need any major articulation features anyway. Once you decide on the type of mount you want, you also need to make sure that it will fit your television’s mounting holes. All modern televisions are VESA mount-compatible, which simply means that they comply with the Video Electronics Standards Association’s mounting standard used by pretty much every TV mount on the market. However, televisions have different mounting holes, so it’s important to get the right size mount that will fit your specific TV. Luckily, thanks to the VESA standard, it’s really easy to figure out what mount size you need. If you look on the back of your television, there will be four screw holes that form a square. Simply measure the distance between two of those screw holes (not diagonally) in millimeters. So if the distance is 400 millimeters, you would need a VESA 400 mount (or sometimes called VESA 400×400). Luckily, most tilting mounts are compatible with pretty much any VESA mount size, but it’s always a good idea to check before you buy one. Selecting the best and right location to mount your TV. Now that you have the TV wall mount, its important that you pick the proper location because you just can’t pick a random spot and start screwing it in. Televisions and the mounts themselves are heavy, so you need to make sure that you mount your TV correctly so that it doesn’t come crashing down after you install it. Checkout the following site to know what tools you'll need to do this job right: The Basic Tools Every DIYer Should Own You’ll need to screw the TV mount into wall studs for maximum holding power—if you just mount it to the drywall, you’re sure to cause a lot of damage, since drywall isn’t actually that strong. Get a stud finder and use it to locate the studs behind the drywall. Studs are placed every 16 inches on center, so you should be able to mount your TV on two studs if you’re using a tilting mount, sometimes three studs if you have a larger television and mount. From there, place the TV mount where you want it (have a second person there to help) and mark with a pencil where you need to screw it into the wall, making sure that there are studs at these locations. Before you screw in the TV mount, though, you’ll need to drill pilot holes, which will prevent the studs from splitting when you drive in the screws. Plus, if the mount uses thicker screws or bolts, it’ll be pretty much impossible to drive them in without drilling pilot holes anyway. Remember that the drill bit for the pilot hole will need to be just slightly smaller than the width of the screw. Once you have your pilot holes drilled, you can now position the TV mount on the wall and drive in the screws or bolts using a power drill or socket wrench (depending on the type of screws or bolts used). There will likely be instructions included with your TV mount, so be sure to take a close look at those if you’re unsure of anything. After you’ve placed the mount on the wall, it’s just a matter of attaching the brackets to your TV using the four screw holes on the back of the television, and then hooking that up to the wall mount. 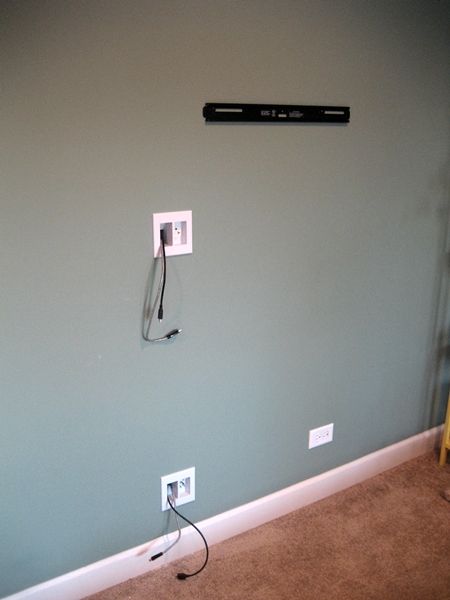 Hiding those pesky wires. The best option is to install a organizer kit that more or less creates an extension cord behind the wall using code-compliant electrical wire, as well as a dedicated tube to feed other cables through. This will allow you to plug the TV in right where the mount is, and the rest of the cables get routed down near the baseboard where you can then plug the cables into their respective devices. (You could just drill two holes in the wall and run the cables through them, but that’s against code.) However, installing something like this requires cutting a hole in your wall and a bit of electrical know-how, so if you’re not quite sure what to do, feel free to call a local handyman or electrician to do it for you, or get a knowledgable friend who can help out. If you’d rather not make giant holes in your wall either way, then the easiest method is to buy a cord hiding kit that you simply screw to the wall and route all of the cables through that. It won’t make the cables completely hidden, but it will look a lot cleaner than just leaving the cables dangling. In the end, mounting a TV to the wall isn’t too difficult, and I highly recommend it if it’s possible to do in your home. You'll be happy you took the time to do it and your family and guests will like the clean look.
0 Comments
 Most DIY people that we work with sometimes run into projects that are above their knowledge, experience or the project is just plain too complex for them to tackle. They have to bring in the big guns....the pro's! The most valuable source of good contractors are you family and friends who have had work done on their home. They'll give you an unbiased opinion and what you can expect to pay. You'll have to verify their credentials (contractors license), workman's compensation and liability insurance requirements. You can do all of this by visiting your state licensing board or a national registry that will redirect your inquiry to your particular state. You should also interview and get bids from at least 3 separate contractors so that you'll be able to get the best price with a schedule that you'll be comfortable with.
There are also national services that prescreen contractors by location and trade. The names may sound familiar to you; Angie's List, HomeAdvisor, and Local Handyman Pro's, just to name a few. These are trusted names that provide a good source of qualified contractors that work in your area. These are the type of projects that may present a challenge to all DIY'ers due to the size of the work and what impact it would make if you made a mistake.
This is the most important advise we can give if you do go ahead a hire a professional. Make sure that your contractor plans to stay and finish your project until its completed. Less reputable contractors may take your downpayment and then disappear for a few days to start or work on other projects. You can insure that your contractor will stay the course if you set up payment draws based on the work that they've completed. Our friends at "Building Advisors" has set up and good example of how you can pay your contractor based on the work that they have achieved. Check it out "HERE". 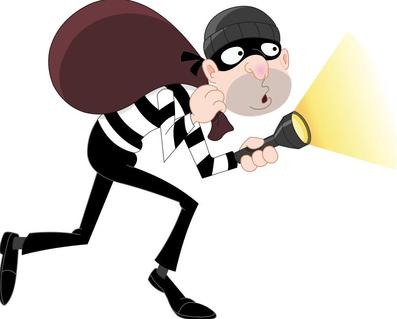 If you want to protect your home and the people and things within it but a monthly security system is financially out of reach. Don't stress, we've got several ideas to make your home less attractive to would be thieves! The Washington Post did a study about where thieves gain entry into homes and how most burglaries happen. Many of the things that you will learn are basic common sense that can be applied immediately.  Studies have determined that most burglaries occur between the times of 10:00 am and 3:00 pm.
(Wikipedia also adds weekdays, and August being highest for burglary rates in the U.S.): Burglars look for homes that appear unoccupied, and residential homes, as you know, tend to be empty during those hours because people are at work. If you're out of the house during those hours and are concerned about burglaries in your neighborhood, consider setting a random timer to turn the TV or radio on during those hours. If you have a second car, keep it out in the driveway while you're at work. If you have a gardener or a pool service, schedule them to come to your home during the aforementioned hours. A typical house burglar is a male teen in your neighborhood—not a professional thief. 60 seconds is the most burglars want to spend breaking into your home. This suggests you only need enough security to thwart the regular person. Simple things like regular "beware of dog" signs work, especially if you add some additional supporting evidence of dog ownership, like leaving a dog bowl outside by your side door. The Washington Post suggests deadbolt locks, bars on windows, and pins in sash windows may be effective theft deterrents. It goes without saying to make sure all the entry points are locked (but, still, only 6% of burglaries happen that way). Homes without security systems are about 3 times more likely to be broken into. In lieu of actually signing up for a home security system, you could also just buy the decals and signs off of eBay or elsewhere, writes reddit user rehdit. Place the decals on your front door, where the majority of thieves enter. In a majority of burglaries, thieves come through: The front door, first-floor windows, and back door primarily, followed by the garage, unlocked entrances, and the basement. Look at reinforcing all of these entry points, of course, but if you want to know where the best places are to put your security cameras, the front and back door and first floor windows are your best bets. Fake security cameras placed at those points might also be effective. Outside lighting should be located near their potential entry points and have motion sensing features that will scary away any would be thieves when the light is triggered. Burglaries typically only last between 8 to 12 minutes. So if your home is broken into, you want to make sure that you make it difficult for them to find anything of value. Dresser drawers, bedroom closets and believe it or not, freezers are the first places that thieves look, so don't put your valuables in these places. One of our partners, "The Family Handyman" has put together list of ingenious hiding places for your most valued items. When on vacation. In the age of social media, many of us are so eager to share our family vacation pictures with our family and friends in real time......this is a clear indication to any would be thief that you are not home! Another one of our partners "Lifewire" has prepared a "Do's and Don'ts when on a vacation relative to your home's security. Get to know your neighbors well so that when you are away from home, they'll know and will keep an eye on your place. They may also be able to help you by putting away your garbage cans, picking up your mail and newspapers, etc.. In Summary The facts are, if and when a burglar wants to break into your home, they more than likely can and will. However, if you use some of the tips that we mentioned above, it may give the would be thief second thoughts......the saying goes something like this: "thieves always seek the path of least resistance". Have you or someone accidentally bumped into one of the walls within your home and made a big dent or hole? It happens to everyone and unfortunately if you hire a handyman to come to your house to fix it, it will cost you a couple of hundred dollars. Today, we'll show you how to quickly fix your damaged drywall quickly and fairly cheaply. These are the tools and materials that you will need to do the work. ToolsMaterials
This video will go over the process step by step. You'll soon have a patched up wall ready for paint! Unplugging toilet is one of the grossest and unwanted household jobs imaginable. What can make this unwanted chore the worst? It's when your toilet is clogged and you don’t have a plunger on hand? It's one of the worst feelings in the world! It’s actually not impossible to fixed your crappy situation without a plunger. If you have a clogged toilet and you don’t have a plunger (or if don’t want to use a plunger because it’s too gross), give this idea a try. It’s not guaranteed to work every time but people have written in saying it’s worked for them on numerous occasions. In this case in particular (although it was staged, technically) this method got rid of a very large wad of paper towels, which gives us hope that this technique can handles some of your worst clogging situations. We used dish soap but others have said liquid laundry detergent works even better. Here’s what you’ll need and what you’ll need to do to get your toilet running smoothly again. Materials
Directions
The entire time for the project takes about a half hour, and that includes the 20 minutes you should wait to let the bowl clear up again. So, for physical work, it should require about 10 minutes of your time. Considering that it takes people often close to a half hour of intense plunging with a more traditional method, this is obviously a pretty simple method. This does not work for all clogs but people have reported success by repeating steps 1-3 again if it doesn’t clear the clog the first time. Some said they did this at night and the clog was gone in the morning. And being able to fix a clog without being elbow-deep in toilet water? That is well worth giving this trick a try. |
AuthorsWe're local handy guys and girls who love to build things, rebuild things and create things! ArchivesCategories |
 RSS Feed
